OpenCV를 이용한 얼굴 인식
Eigenfaces in OpenCV
Eigenface를 이용한 얼굴인식을 아래 도큐먼트를 참고하여 구현해 보았다.
http://docs.opencv.org/modules/contrib/doc/facerec/facerec_tutorial.html
Eigenface source code
#include "opencv2/core/core.hpp"
#include "opencv2/contrib/contrib.hpp"
#include "opencv2/highgui/highgui.hpp"
#include <iostream>
#include <fstream>
#include <sstream>
using namespace cv;
using namespace std;
static Mat norm_0_255(InputArray _src) {
Mat src = _src.getMat();
// Create and return normalized image:
Mat dst;
switch(src.channels()) {
case 1:
cv::normalize(_src, dst, 0, 255, NORM_MINMAX, CV_8UC1);
break;
case 3:
cv::normalize(_src, dst, 0, 255, NORM_MINMAX, CV_8UC3);
break;
default:
src.copyTo(dst);
break;
}
return dst;
}
static void read_csv(const string& filename, vector<Mat>& images, vector<int>& labels, char separator = ';') {
std::ifstream file(filename.c_str(), ifstream::in);
if (!file) {
string error_message = "No valid input file was given, please check the given filename.";
CV_Error(CV_StsBadArg, error_message);
}
string line, path, classlabel;
while (getline(file, line)) {
stringstream liness(line);
getline(liness, path, separator);
getline(liness, classlabel);
if(!path.empty() && !classlabel.empty()) {
images.push_back(imread(path, 0));
labels.push_back(atoi(classlabel.c_str()));
}
}
}
int main(int argc, const char *argv[]) {
// Check for valid command line arguments, print usage
// if no arguments were given.
if (argc < 2) {
cout << "usage: " << argv[0] << " <csv.ext> <output_folder> " << endl;
exit(1);
}
string output_folder = ".";
if (argc == 3) {
output_folder = string(argv[2]);
}
// Get the path to your CSV.
string fn_csv = string(argv[1]);
// These vectors hold the images and corresponding labels.
vector<Mat> images;
vector<int> labels;
// Read in the data. This can fail if no valid
// input filename is given.
try {
read_csv(fn_csv, images, labels);
} catch (cv::Exception& e) {
cerr << "Error opening file \"" << fn_csv << "\". Reason: " << e.msg << endl;
// nothing more we can do
exit(1);
}
// Quit if there are not enough images for this demo.
if(images.size() <= 1) {
string error_message = "This demo needs at least 2 images to work. Please add more images to your data set!";
CV_Error(CV_StsError, error_message);
}
// Get the height from the first image. We'll need this
// later in code to reshape the images to their original
// size:
int height = images[0].rows;
// The following lines simply get the last images from
// your dataset and remove it from the vector. This is
// done, so that the training data (which we learn the
// cv::FaceRecognizer on) and the test data we test
// the model with, do not overlap.
Mat testSample = images[images.size() - 1];
int testLabel = labels[labels.size() - 1];
images.pop_back();
labels.pop_back();
// The following lines create an Eigenfaces model for
// face recognition and train it with the images and
// labels read from the given CSV file.
// This here is a full PCA, if you just want to keep
// 10 principal components (read Eigenfaces), then call
// the factory method like this:
//
// cv::createEigenFaceRecognizer(10);
//
// If you want to create a FaceRecognizer with a
// confidence threshold (e.g. 123.0), call it with:
//
// cv::createEigenFaceRecognizer(10, 123.0);
//
// If you want to use _all_ Eigenfaces and have a threshold,
// then call the method like this:
//
// cv::createEigenFaceRecognizer(0, 123.0);
//
Ptr<FaceRecognizer> model = createEigenFaceRecognizer();
model->train(images, labels);
// The following line predicts the label of a given
// test image:
int predictedLabel = model->predict(testSample);
//
// To get the confidence of a prediction call the model with:
//
// int predictedLabel = -1;
// double confidence = 0.0;
// model->predict(testSample, predictedLabel, confidence);
//
string result_message = format("Predicted class = %d / Actual class = %d.", predictedLabel, testLabel);
cout << result_message << endl;
// Here is how to get the eigenvalues of this Eigenfaces model:
Mat eigenvalues = model->getMat("eigenvalues");
// And we can do the same to display the Eigenvectors (read Eigenfaces):
Mat W = model->getMat("eigenvectors");
// Get the sample mean from the training data
Mat mean = model->getMat("mean");
// Display or save:
if(argc == 2) {
imshow("mean", norm_0_255(mean.reshape(1, images[0].rows)));
} else {
imwrite(format("%s/mean.png", output_folder.c_str()), norm_0_255(mean.reshape(1, images[0].rows)));
}
// Display or save the Eigenfaces:
for (int i = 0; i < min(10, W.cols); i++) {
string msg = format("Eigenvalue #%d = %.5f", i, eigenvalues.at<double>(i));
cout << msg << endl;
// get eigenvector #i
Mat ev = W.col(i).clone();
// Reshape to original size & normalize to [0...255] for imshow.
Mat grayscale = norm_0_255(ev.reshape(1, height));
// Show the image & apply a Jet colormap for better sensing.
Mat cgrayscale;
applyColorMap(grayscale, cgrayscale, COLORMAP_JET);
// Display or save:
if(argc == 2) {
imshow(format("eigenface_%d", i), cgrayscale);
} else {
imwrite(format("%s/eigenface_%d.png", output_folder.c_str(), i), norm_0_255(cgrayscale));
}
}
// Display or save the image reconstruction at some predefined steps:
for(int num_components = min(W.cols, 10); num_components < min(W.cols, 300); num_components+=15) {
// slice the eigenvectors from the model
Mat evs = Mat(W, Range::all(), Range(0, num_components));
Mat projection = subspaceProject(evs, mean, images[0].reshape(1,1));
Mat reconstruction = subspaceReconstruct(evs, mean, projection);
// Normalize the result:
reconstruction = norm_0_255(reconstruction.reshape(1, images[0].rows));
// Display or save:
if(argc == 2) {
imshow(format("eigenface_reconstruction_%d", num_components), reconstruction);
} else {
imwrite(format("%s/eigenface_reconstruction_%d.png", output_folder.c_str(), num_components), reconstruction);
}
}
// Display if we are not writing to an output folder:
if(argc == 2) {
waitKey(0);
}
return 0;
}
MFC 버전으로 만들고 실험한 결과
아래 "등록된 얼굴 정보" -> 인식을 위해 학습한 사람
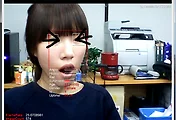
얼굴 검출화면에서 노란색 사각형이 검출된 결과이고,
얼굴 인식 화면에서 녹색 사각형이 등록된 얼굴정보와 일치하여 녹색 사각형으로 표시한 것이다.
빨간색은 인식 결과 일치하는 정보가 없음을 뜻한다.
MFC 버전은 이쁘게 정리하여 나중에 업로드 할 예정
수업과제땜에 대충 만들어서 UI에 버튼만 존재한다며..
'과거자료 > 컴퓨터비전' 카테고리의 다른 글
| 웹캠. 적외선 카메라 개조 (2) (3) | 2015.01.12 |
|---|---|
| 웹캠. 적외선 카메라 개조 (1) | 2014.12.30 |
| Face Detection - Modified Census Transform (MCT) Demo (1) | 2013.01.31 |
| OpenCV 2.4.3 얼굴 및 눈영역 검출 face and eye detection (1) | 2013.01.15 |
| Visual Studio 2010 + OpenCV 2.4.3 설치 (0) | 2012.12.12 |


